If you're looking to share a laugh with a friend, swap parenting survival tactics and generally feel affirmed that, yes, you're doing fine, then you're in the right place. Welcome!
Showing posts with label Recipes. Show all posts

Thursday, 10 October 2013

My Fav Low-Fat Pumpkin Pie Recipe

I'm aiming to bring a couple of pumpkin pies to the extended family Thanksgiving dinner this weekend (ask me next week if they actually got made...). If your family is like mine, then pie is the only item I can count on my kids eating at Thanksgiving. So, I like to make mine as healthy as possible, y'know, relatively speaking.

I've had really good success working off the Best Light Pumpkin Pie recipe at FoodandHealth.com, but with a few changes:

Low Fat Pumpkin Pie Recipe

16 ginger snap cookies
2 tsp oil
water as needed
16 oz pureed pumpkin (2 cups)
1/2 cup egg whites (that's about 3 eggs-worth)
1 cup sugar
1 1/2 cup 2% or no-fat evaporated milk
1 tsp cinnamon
1/2 tsp each nutmeg and ginger
1/4 tsp cloves


  1. Grind or crush the ginger snaps. Mix with the oil and enough water to moisten (not wet) and press evenly onto the bottom and sides of a pie plate. (I use either an 8" or 9" pie plate, depending on what's clean.)
  2. Mix remaining ingredients together. (Adjust the sugar and spices, if you like, according to your family's taste.) Pour into crust.
  3. Bake at 350 C for appx 45 min, or until centre of pie is set and knife inserted into middle comes out clean.
  4. Refrigerate. Enjoy!
If you like extra spice, try mixing in some chopped candied ginger or some ginger jam with the filling before baking. Yum!

Do you have a healthy pie recipe you love? Share it with us!

Happy Thanksgiving everyone!

Monday, 29 October 2012

Recipe: Key Lime Cake With Meringue Topping

This moist and tart key lime cake, with its bright green colour, is a perfect dessert for Halloween or St. Patrick's Day, though it's fantastic any other time, too. (My own particular "special" occasion was that my toddler had chewed open a box of lime jello and I needed to do something with it.)

I was inspired by "Dot's Key Lime Pie" recipe (which is still for cake, not pie) and changed it to reduce the fat content quite a lot, as well as lightening up on the sugar.

Key Lime Cake With Meringue Topping

Cake
1/3 cup lime juice
1/3 cup powdered sugar
__________

1 cup sugar
2 cups flour
1 tsp. baking powder
1/2 tsp. baking soda
1 tsp. lemon extract
1 small package lime jello
3 eggs
1/2 cup oil
1 cup plain, low-fat yogurt
3/4 cup diluted lime juice (I only had lemon on hand, and it worked fine too)
1/2 tsp. vanilla extract

-Dissolve powdered sugar in 1/3 cup lime juice and set aside.
-Mix remaining ingredients in a bowl and beat until well-blended.
-Pour batter into greased 9x13 pan.
-Bake at 350 degrees C, 30 minutes or until tester inserted in centre comes out dry.
-Let cake stand 15 minutes, then prick all over with a fork and pour juice over.

Meringue
3 eggs whites
1/4 tsp. cream of tartar
1/3 cup sugar

-Beat egg whites and cream of tartar together until frothy.
-Still beating, gradually add sugar, and continue beating until stiff peaks form.
-Spoon mixture evenly onto cake. Bake at 425 degrees for 5-7 minutes until golden.

(Sorry no picture; not organized enough with the camera. Next time!)

Monday, 20 August 2012

Recipe: Watermelon Syrup


We love, love, love watermelons! But every now and then, I manage to pick a dud. Last week, for example, I bought one of these luscious green orbs, only to find the next morning that it had ruptured overnight and oozed pink sticky liquid all over my kitchen.

The whole melon was bloated and soft, so I wasn't surprised that when I cut it open there was a slight "tang" to the pulp. Yes, I did indeed taste it. I am always very reluctant to throw out a whole anything if some part can be salvaged (plant food only, of course). But what to do with a medium-sized watermelon that's beginning to ferment?

A few years ago, I discovered a recipe for watermelon syrup in Extending the Table: A World Community Cookbook published by the Mennonite Central Committee (who also brought us the legendary More With Less cookbook). Well, actually it's a recipe for watermelon jam, but I no longer do canning (another Before Children activity) and thus rarely have pectin in my pantry. Regardless, without the packaged pectin, it still makes a slatheringly-good syrup!

Here's my no-pectin, non-canning version:

Watermelon Syrup
1 medium watermelon
5 cups sugar
1/4 cup lemon juice
1 - 2 teaspoons ground ginger (or less, if you prefer mild spice)

  1. Cut up the watermelon and remove the rind and any seeds. (I leave the white, soft seeds, and remove only the black, hard seeds.) 
  2. Mash or puree the pulp.
  3. In a large pot, combine the watermelon pulp, lemon juice and ginger, and bring to a rolling boil. 
  4. Quickly add the sugar, and return to a boil.
  5. Boil for at least 1 minute, or until the water content is somewhat reduced and a slightly thickened liquid results. Cool and ladle into containers. Refrigerate.
It's great over plain yogurt, waffles or pancakes, cereal... But watch out! It's seriously habit-forming. (Last year, my partner asked me, "What are you doing, drinking the stuff??" ... no... maybe...)

Blondie's Watermelon Jam
If you're into canning --or want to give it a try-- check out this beautiful recipe with very helpful instructions for watermelon jam from Blondie's Cakes and Things.

I feel like I'm having a taste of summer when I eat my watermelon syrup. Do you have any easy ways to capture the tastes of summer's bounty?


Thursday, 28 June 2012

Recipe: Sweet Potato Chili With Polenta

Chocolate-Covered Katie's yummy-looking version
Warning! I have served this dish twice to my boys, and both times they gobbled it up!

(The following is a riff on "Chocolate-Covered Katie"'s recipe and Rose Reisman's from her vegetarian cookbook which seems to be out of print.)

Chili
- 1 large onion, chopped
- 2-3 cloves garlic, minced
- 1-2 med. zucchini, diced
- 2-3 sweet potatoes, cubed
- half a fennel (anise) bulb, finely chopped

- 1-2 cans kidney beans
- 1 can diced tomatoes
- appx. 1 cup corn kernels, frozen or fresh (optional)
- 1 1/2 cups stock, chicken or veggie

- 1 tbs chili powder, or to taste
- 1 tbs ground cumin, or to taste (myself, I usually use a lot)
- salt, if desired

1. To prep the fennel, cut the bulb in half lengthwise and remove the feathery fronds. Then, remove the solid core of the bulb, cutting an upside-down "V"and prying it out. Thinly slice the de-cored half bulb, and finely chop.

2. Prep the other veggies.

3. Combine all ingredients in a large pot. Bring to a boil, and simmer until potatoes are soft. Chili often tastes even better when the flavours marry a bit --so make a big batch and eat it more than once!

Polenta
Chili over polenta was a big hit, but I have also served it over brown rice. (Toast is a great alternative when time is short.)

- 3 cups stock, chicken or veggie
- 1 cup polenta
- salt, if desired

1. Bring stock to a boil. Add polenta, and simmer gently for appx. 5 minutes, stirring occasionally. Remove from heat and let stand a few minutes before serving.

What's your favourite vegetarian chili recipe?

Friday, 20 April 2012

Lightening McQueen Cake, The Recipes

Here's the 411 on how I made the Lightening McQueen cake. I'm no expert, but this is what worked for me. (**FYI, I rented the shaped pan, and it needed 2x either cake recipe to fill it.)


Cake
I tried two different cake recipes:
1. a dairy-free, spelt flour cake, and
2. a low-fat cake (with dairy and the usual all-purpose flour).

My second attempt came out of the pan much more easily than the first, I think due to the change in cake recipe and also the fact that I had both oiled and floured the pan. (I had only oiled with the first cake. I used canola oil both times --the shortening that the instructions recommended is really not necessary, so save yourself from the trans fats.)

Tried-And-True Dairy-Free Chocolate Cake
1 1/2 cups spelt flour (regular all-purpose works too)
1 cup sugar
1/4 cup cocoa powder
1 tsp soda
1/4 cup + 1 tbs oil
1 tbs white vinegar
1 tsp vanilla
1 cup cold water (or soy milk)

Preheat oven to 350 degrees Celsius. Mix the dry ingredients together well. Add the oil, vinegar and vanilla. When the mixture is thoroughly moistened, add the water and mix until smooth.
(Normally, pour into greased 8 x 8 pan and bake 30-35 min. This recipe can alternatively make 12 medium-sized cupcakes. Bake for 20 min.)

Low-Fat Chocolate Cake
I made Rose Reisman's Sour Cream Chocolate Cake from her Divine Indulgences dessert cookbook (using low-fat yogurt instead of low-fat sour cream). But her Milk Chocolate Fudge Cake would work just as well.


Icing
For piping the decoration, I used two types of no-fat icing: Royal Icing, a stiff egg white-based icing for piping the outlines; and a cooked "7-Minute" egg white icing with a softer consistency that I used for filling in shapes. (A #4 round decorating tip worked fine for both applications.)

No-Fat Royal Icing
I had good success (both times) following the directions in Mrs. Beeton's Traditional Cake Decorating. This is a very traditional (and, therefore, I think not proprietary) way to make Royal Icing, beaten entirely by hand with a wooden spoon. You must be sure there is no grease on either the spoon or in the bowl before you start.

Available through Amazon
-Put two egg whites in a bowl, break them up with a fork.
-Then gradually add icing sugar, up to approximately 2 cups, beating thoroughly with the wooden spoon between additions.
-Keep beating (your arm will get sore) until the icing is white (not creamy) and the required stiffness.
-I found that a soft peak stage icing piped well ("soft peak"meaning that when you lift the spoon out of the icing, an icing peak forms, but flops over).
-Make sure any icing you're not directly working with stays covered, as it will otherwise dry out.

Here's also a link to a recipe that calls for use of an electric mixer. I haven't tried it, so do let me know if it works for you.


Canadian Living's version
No-Fat Cooked "7-Minute" Icing
An online version of my favourite icing is here. (Myself, I use corn syrup instead of cream of tartar.) I typically make this into chocolate icing by folding in 2 or 3 squares of melted, unsweetened chocolate after I've removed the icing from the heat (though that does add fat).


Decorating
On my first attempt, I tried following the instructions that came with the pan, but I felt that complicated things. So, on the next go-round, I did my own thing, following two basic principles:

1. outline everything first, beginning with the larger shapes, which provides points of reference for then outlining the smaller shapes;
2. mix the icing colours as needed, working up and down the colour scale (e.g. use leftover yellow to make orange).

Here's what worked for me:
-First, I iced the sides of the cake in white "7-Minute" icing with a knife.

-Next, in a new bowl, I coloured some Royal Icing black (add cocoa powder first to darken the icing) and piped the outlines of Lightening McQueen. Then I used it to fill in the tires of the car by piping in sweeping lines across the shape and "smoothing" the icing just with my finger.

-Then, in another bowl, I mixed some blue "7-Minute" icing. In the icing bag I mixed some of the blue icing with a dab of the black icing to make a grey-blue. This filled the side windows and the muffler, using the same technique as with the black.

-After cleaning the bag, I put in some of the un-tinted blue (i.e. no black) icing and piped Lightening's eyes and the little blue lightening bolt on his hood.

-Back to white! Cleaned the bag again, and used the Royal Icing to fill the front windscreen, headlights and smile (again smoothing with my finger) and to outline the racing number on Lightening's side. (I used the Royal Icing for both applications basically because I didn't feel like switching.)

-Next, in another bowl, I mixed, piped and smoothed some "7-Minute" icing in yellow, then orange, and finally red, which covered the body.

As I mentioned, I found a #4 decorator tip to work fine for both piping the outline and filling the shapes.

From Wilton
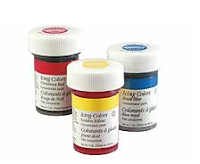
For colouring, I used Wilton's gel colours and was quite pleased at how they performed. (On a side note, does anyone have a lead on decorating with more "natural" colourants?)

Phew! Finally done!
Related Posts Plugin for WordPress, Blogger...