 Here's the 411 on how I made the Lightening McQueen cake. I'm no expert, but this is what worked for me. (**FYI, I rented the shaped pan, and it needed 2x either cake recipe to fill it.)
Cake
I tried two different cake recipes:
1. a dairy-free, spelt flour cake, and
2. a low-fat cake (with dairy and the usual all-purpose flour).
My second attempt came out of the pan much more easily than the first, I think due to the change in cake recipe and also the fact that I had both oiled and floured the pan. (I had only oiled with the first cake. I used canola oil both times --the shortening that the instructions recommended is really not necessary, so save yourself from the trans fats.)
Tried-And-True Dairy-Free Chocolate Cake
1 1/2 cups spelt flour (regular all-purpose works too)
1 cup sugar
1/4 cup cocoa powder
1 tsp soda
1/4 cup + 1 tbs oil
1 tbs white vinegar
1 tsp vanilla
1 cup cold water (or soy milk)
Preheat oven to 350 degrees Celsius. Mix the dry ingredients together well. Add the oil, vinegar and vanilla. When the mixture is thoroughly moistened, add the water and mix until smooth.
 (Normally, pour into greased 8 x 8 pan and bake 30-35 min. This recipe can alternatively make 12 medium-sized cupcakes. Bake for 20 min.)
Low-Fat Chocolate Cake
I made Rose Reisman's Sour Cream Chocolate Cake from her Divine Indulgences dessert cookbook (using low-fat yogurt instead of low-fat sour cream). But her Milk Chocolate Fudge Cake would work just as well.
Icing
For piping the decoration, I used two types of no-fat icing: Royal Icing, a stiff egg white-based icing for piping the outlines; and a cooked "7-Minute" egg white icing with a softer consistency that I used for filling in shapes. (A #4 round decorating tip worked fine for both applications.)
No-Fat Royal Icing
I had good success (both times) following the directions in Mrs. Beeton's Traditional Cake Decorating. This is a very traditional (and, therefore, I think not proprietary) way to make Royal Icing, beaten entirely by hand with a wooden spoon. You must be sure there is no grease on either the spoon or in the bowl before you start.
 |
| Available through Amazon |
-Then gradually add icing sugar, up to approximately 2 cups, beating thoroughly with the wooden spoon between additions.
-Keep beating (your arm will get sore) until the icing is white (not creamy) and the required stiffness.
-I found that a soft peak stage icing piped well ("soft peak"meaning that when you lift the spoon out of the icing, an icing peak forms, but flops over).
-Make sure any icing you're not directly working with stays covered, as it will otherwise dry out.
Here's also a link to a recipe that calls for use of an electric mixer. I haven't tried it, so do let me know if it works for you.
 |
| Canadian Living's version |
An online version of my favourite icing is here. (Myself, I use corn syrup instead of cream of tartar.) I typically make this into chocolate icing by folding in 2 or 3 squares of melted, unsweetened chocolate after I've removed the icing from the heat (though that does add fat).
Decorating
On my first attempt, I tried following the instructions that came with the pan, but I felt that complicated things. So, on the next go-round, I did my own thing, following two basic principles:
1. outline everything first, beginning with the larger shapes, which provides points of reference for then outlining the smaller shapes;
2. mix the icing colours as needed, working up and down the colour scale (e.g. use leftover yellow to make orange).
Here's what worked for me:
-First, I iced the sides of the cake in white "7-Minute" icing with a knife.

-Next, in a new bowl, I coloured some Royal Icing black (add cocoa powder first to darken the icing) and piped the outlines of Lightening McQueen. Then I used it to fill in the tires of the car by piping in sweeping lines across the shape and "smoothing" the icing just with my finger.

-After cleaning the bag, I put in some of the un-tinted blue (i.e. no black) icing and piped Lightening's eyes and the little blue lightening bolt on his hood.
-Back to white! Cleaned the bag again, and used the Royal Icing to fill the front windscreen, headlights and smile (again smoothing with my finger) and to outline the racing number on Lightening's side. (I used the Royal Icing for both applications basically because I didn't feel like switching.)


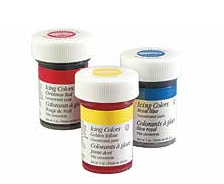 |
| From Wilton |
Phew! Finally done!
No comments:
Post a Comment